Configuring the M9420 for Signal Studio
This topic is not comprehensive, but endeavors to describe the steps unique to M9420A VXT configurations with Signal Studio products. It is recommended that you already have a basic working knowledge of the M9420A VXT.
-
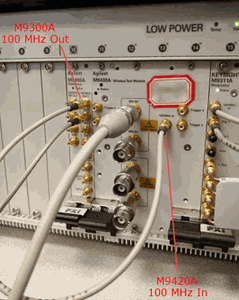
Connect an SMB cable from the 100 MHz Out connector of the M9300A to the 100 MHz In connector of the M9420A.
-
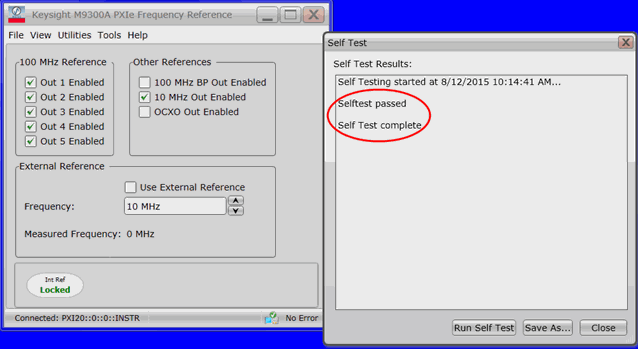
Launch the M9300A SFP software. This must be done before launching the M9420A SFP software.
-
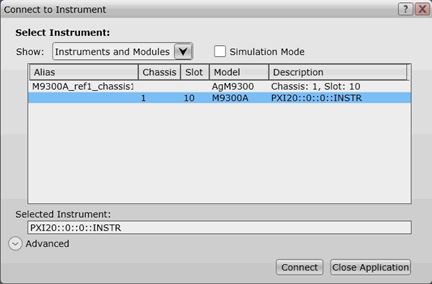
The M9300A SFP software recognizes the reference configuration automatically. Verify that the slot (10) and PXI address are correct. Then highlight it and click .
-
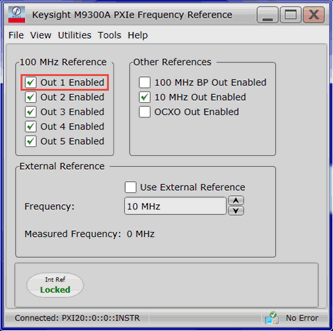
Verify that the specific 100 MHz Reference Out port connected to the M9420A is enabled.
-
Select > and click to verify the reference connection.
-
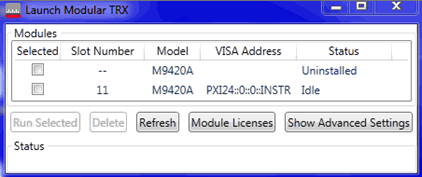
Under All Programs on your PC, open the Keysight Modular Transceiver folder and select LaunchModularTRX. A small window appears. Verify that the M9420A occupies slot number 11.
-
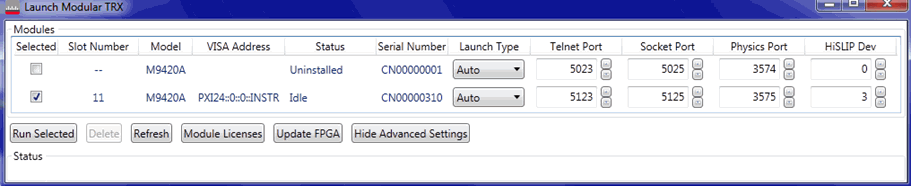
Click and configure the valid port for VISA communication. To avoid conflict with other instruments in the same chassis, use the vacant values for HiSLIP, Telnet, and Socket ports.
-
Make sure the correct module is selected and click . The M9420A VXT soft front panel launches.

-
Open the Signal Studio software. A welcome dialog window appears. Select . Click . This begins the System Configuration Wizard, which takes you through the steps to connect to the M9420A VXT.
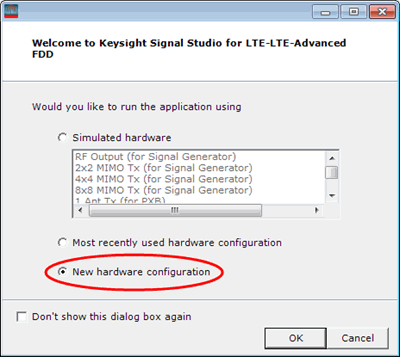
If the welcome dialog window does not appear when the software is launched, click > and make sure is checked. Then close and re-open the software.
-
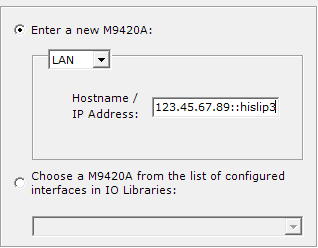
In Step 4 of the System Configuration Wizard, make sure the host name entered uses this syntax: <hostname>::hislip<module number>. See example shown below.